Video Extensometer
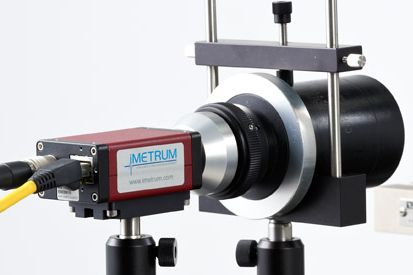
Universal Video Extensometers
Imetrum’s Video Extensometers save you time and money when testing and qualifying materials. They offer traceable, best in class resolution, with proven Video GaugeTM technology delivering performance way beyond the alternatives.
Imetrum systems meet the most demanding requirements for strain, elongation and modulus measurements in tensile, compression, flex, shear and peel tests.
Specification
Main function:
Our Video Extensometers can deliver resolutions to better than 3 microstrain / 10 nanometres. They also calibrate to unparalleled accuracies, with ISO9513 class 0.5/ASTM E83 B-1 possible, even at low strains and gauge lengths.
The benefits:
- Time and cost savings, with minimal sample preparation and intuitive software.
- Measures through failure without risk of damage to the equipment.
- Avoids problems of clip-on devices that can compromise results, such as knife edges slipping or causing damage to the specimen.
- Eliminates the costs and operational challenges of using strain gauges.
- Re-analyse a test, even after the specimen has been destroyed, by post-processing a video archive.
- Compatibility with a wide range of test frames and control software.
- Simple target marking solutions to facilitate the highest quality measurements.
Eliminates the need for multiple measurement devices :
- Works with all materials (e.g. composites, metals, plastics, rubbers, ceramics).
- Use for tension, compression, flex and shear tests.
- Hazard-free use for high and low temperature testing (from less than -100°C to more than 1000°C).
- More than 200 simultaneous measurements in real time.
- Measures axial, transverse and dual-average strains & extensions.
- Measures modulus, elongation, Poisson’s ratio, shear strain, rotation and displacement.
- Incorporates Full-field Digital Image Correlation capability.
Precision Displacement Trackers
The 3D PDT is a powerful, camera-based displacement sensor that slashes test setup times, reduces cost and delivers accurate, rich data sets. It is a highly flexible alternative to LVDTs, DTIs, EDMs, encoders, laser trackers and potentiometers.
The 3D PDT is pre-calibrated and ready to measure – there is no need to spend time calibrating, learning how to calibrate, or worrying if a system is in calibration.
Specification
Main function:
The flexibility of the PDT ensures it is suitable for a wide range of applications, including acceptance testing; deformation measurement; measuring component stiffness; Measuring compliance in bearings, couplings and fastenings; understanding static and dynamic behaviour; measurement of hot and delicate components & validating and correlating with FE models.
The benefits:
The Precision Displacement Tracker reduces test setup times and costs by overcoming many of the challenges associated with traditional sensors:
- No need to build rigid mounting frames and bracketry for each sensor
- Improved access to test components
- Faster component swapping for the next test
- No risk of damage to sensors when test goes to failure
- No data-logger, signal-conditioning or delicate wiring to install
- Highly immune to noise and errors from electrical interference, temperature change and drift.
Many sensors only measure linear displacement, but the 3D PDT measures every point of interest in all three dimensions. A single 3D PDT can therefore replace numerous other gauges, whilst still delivering live, synchronised real-time measurements. Micron-level resolution is delivered on measurement volumes up to several metres. Being a non-contact system also delivers improved accuracy in many cases as there is:
- No mass or friction in the sensor
- No obstructions to airflow during aerodynamic testing (e.g. wind tunnels)
- No false displacements from sliding of the sensor probe across the component’s surface.
Dynamic Monitoring Stations
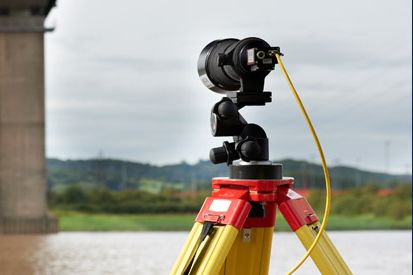
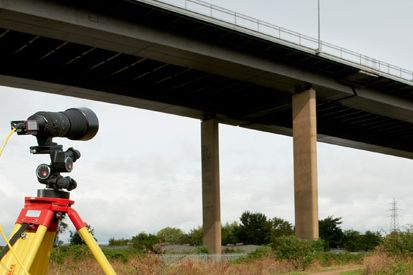
Imetrum’s Dynamic Monitoring Station (DMS) can be used to monitor the dynamic movement of civil and geotechnical structures.
The DMS system is able to measure position (displacement, distance), strain (expansion, contraction, crack opening) and rotation (twist, tilt and bending) of a structure. One of the key advantages of using DMS is that there is no need to access a structure directly to measure it.
Specification
Main function:
This eliminates many project delays related to access such as arranging possessions or traffic management, and also delivers safer working practices by keeping staff and vehicles apart as well as eliminating the need to work at height or over water.
The benefits:
The DMS is a multi-point dynamic monitoring system that can take measurements similar to those generated by a strain guage, LVDT, tilt meter or Robotic/Automated Total Station. The system is easily scalable, and has been used for testing individual structures from less than 1 m to over 1 km long.
Imetrum’s DMS has been independently benchmarked by many companies, including the UK’s National Physical Laboratory. Measurement capability is often described as being “the benefits of a non-contact device, with the resolution of a contacting one”. It can be supplied with calibration certificates from an independent test house if required.
- Multi-point dynamic monitoring
- Real-time measurement of displacement, strain and rotation
- Genuinely non-contact
- Monitor from a point of safety
- Reduce overall monitoring costs
- Up to 0.01mm resolution
- Real time operation (up to 400Hz)
- Supports multiple synchronised cameras
- Record Videos for off-line analysis
- Synchronise with other measurements
- Mains or battery power
- Rugged weatherproof casing
